Showing posts with label painting. Show all posts

Saturday, September 20, 2014

A 40k gamer in Gunpla-land...

So, it's been a little over 1 month since I started constructing and painting Gunpla in the style of my 40k minis.

On the whole, it's been heaps of fun. The poseability of the models has made for more interesting challenges in constructing and painting the models, i.e. rather than the single static pose I'm used to, I had to account for the fact that these models are meant to be movable. As such, I had to be a bit more thorough in reaching every nook and cranny of the model, which meant painting components separately, something quite alien to me.

Also, bringing my experience as a GW hobbyist into Gunpla, there were some things in Gunpla-land that struck me as odd, notably:

  • Gunpla markers - This just seemed like nonsense to me. Painting is meant to be done with a brush!
  • Coloured plastic sprues - I'm going to paint the model anyway; what use have I for coloured plastic? I'd rather they make everything in grey plastic, if that would keep costs (and hence prices) down...
  • Stickers - Not water-slide decals, mind you. These supposed High Grade kits come with stickers! Again, utterly useless to me, but I suppose this is to cater to the needs of small children, like the markers.  

Here's a summary of what kits I've tried thus far, in order of construction:

Gouf Custom

 This one holds a special place in my heart as the first I'd constructed, and it shows in the little errors I'd made in painting it, notably in the elbow joints (not visible in this pic). A nice, straightforward kit, with pretty much no superfluous bling. The gatling shield was a bit fiddly, though. As I had to strike a balance between what I could paint and what could be moved, I chose to glue the weapons permanently into the hands. Citadel colours weren't made for the wear and tear of constant friction like that, so I opted to glue weapons into the hands whenever possible.

Buster Gundam

I had good memories of watching Gundam SEED while in uni, and Buster's got a satisfyingly large gun, so I went for it. This kit annoyed me somewhat with how skinny it was - so scrawny that there's no space for an action base peg in its crotch. Also, on further consideration, I didn't like the cream colour on the original Buster, so sod that, Caliban Green all round!


Sengoku Astray

This is the first Gundam Build Fighters kit I did. I watched the series first, and long before that, I had been in kendo, hoping to one day win the right to bear 2 blades. I stopped kendo before that could happen (long story) but since then I'd always had a soft spot for minis carrying paired swords.

This one's stickers drew particular scorn from me. What use had I, a long time Necron player, for shiny green stickers? Anyway, on constructing the kit, I was drawn to how simple, versatile and flexible the Red Frame was, and became increasingly disenchanted with the over-the-top aesthetic of gunpla from Gundam Build Fighters.

As for the paint job, I tried staying faithful to the colours as seen in the anime, adding my own touch for the glowy green bits, of course. All in all, an ok kit.


Kampfer Amazing

Due to a mistake in spraying, my original plan to keep the colours close to the anime version went to pot, and thus I found myself painting my first miniature in Ultramarine colours. A nice model, but the legs are a little harder to pose, bulky as they are. Also, the weapon binders/thrusters were just too ludicrously big for me to take seriously, and so I left those out.


Genoace Custom

I am led to understand that suits from the Gundam AGE anime series are viewed as childishly simple and hence unsatisfying to build and paint. This one caught my eye for being completely white and so I thought I'd try my hand at doing a nice white model. On top of that, the pilot of this suit in the anime carries the monicker "White Wolf", so I figured it would be a good place to dump some Space Wolf transfers.

It was, as they say, absurdly easy to build and a very simplistic model. I think there's a kind of subdued beauty to it, but yeah, it was easily the quickest to construct, matched only by another AGE suit, Shaldoll Rogue.

I went with a simple white scheme, mostly spraying white, using Nuln Oil to blackline and then go over any mistakes with Ceramite White. As I've mentioned before, a ridiculously easy build.


Shaldoll Rogue


Another ludicrously simple kit from Gundam AGE. By this point, I'd gotten so little satisfaction out of building it, that I just couldn't be arsed to paint it, and so it sits, unpainted, waiting for some day when I've nothing else better to paint...

Jesta Cannon

My current WIP. A nice chunky kit with lotsa guns. By the time I was halfway through with this one, I came to realise that the Universal Century kits were more to my liking, with plenty of simple, practical-ish suits that look like they were designed by engineers rather than over-enthusiastic artists with a tenuous grasp of of real-world physics.


Exia Dark Matter

I was suckered into getting this kit by the fact that it bore two blades. I will say this for the model: It SUCKS. The joints are mostly bereft of the polycaps that give most gunpla their poseability, instead using the same hard plastic as the rest of the model, resulting in joints that become way too loose too quickly. For another, the colour of the supposed red bits is in fact this vile shade of carmine; that is to say, it's pinkish. For someone who's been playing Blood Angels as long as I have, this colour is an abomination.

But, far be it from me to let good plastic go to waste. This one, I will paint. BUT it will never see tabletop action, and will have its joints glued permanently into position and spend the rest of it's days perched atop a GP Base.

So... what next? 
On to MG, I suppose! Well, I gotta have something to keep me busy while I wait for the new BA codex...


Tuesday, September 2, 2014

WIP: Kampfer Ultra

So, following the debacle with the spray (goddammit, Krylon...) Kampfer Amazing is now to be designated Kampfer Ultra. I attempted to paint it in much the same manner as Gouf Mortis, i.e. have a base colour, drybrush a highlight on once, then drybrush a more extreme highlight, then blackline to shade. Here's where we are now:

All the bits getting painted before assembly... 

Where are mah GUNZ???

Looks like he's ready for some police work. It's ok for my purposes, I suppose. Bit messy, so I guess Kampfer Ultra will be my first victim for some experiments in weathering. And there definitely will be an Ultramarine decal or two or three on him when I'm done. Anyway, must move. Lots to do. In the meantime, here's a gratuitous pic of Sengoku Astray and Gouf Mortis settling their differences like gentlemen...


Wednesday, June 4, 2014

Almost got a new Librarian... Aaaand he's done!

Soon, soon...


I've kept to my usual habit of blending red to yellow on force weapons, though this time, I've gone with a different technique. Usually, I start by painting the area for blending Mephiston Red, then work from one end and blend as I go with Blood Red, Trollslayer Orange, Golden Yellow and Vallejo's Pale Yellow. This time, I started with Iyanden Darksun, then blended starting from the centre. I found this saved quite a bit more time and effort.

The blue is achieved with Ultramarine Blue washed with Asurmen Blue, line highlighted with Lothern Blue. I still intend to highlight a little further, perhaps mixing some white in.

As I mentioned earlier, I'd decided to base all the gold areas with Iyanden Darksun before painting on Shining Gold, shading with Devlan Mud. I daresay that is what made a really big difference compared to my old technique of painting layer upon layer of Shining Gold on black, then shading with Chestnut Ink, making the mini as a whole appear much brighter.

<Moments later...>

And here he is, standing amongst my old Librarians for comparison:

What we have here is a small psychic nuclear weapon worth of Librarians... Is that a cat's whisker I see before me? 
Well, I'm pleased with how he turned out, and I've a list or two which I'm itching to try out... Next up, I think it's high time I got back to work on my Grey Knights...

Here he is again, in all his glory, ready to deliver the Emperor's wrath...


Tuesday, June 3, 2014

WIP: Another Librarian

Just got back from a quick break in Sydney a couple of days ago. The thing about going to Australia is that it is, for me, GW hell. Why? EVERYTHING is about 30 to 50% more expensive compared to Malaysia. And just to add insult to injury, there are a LOT of GW shops over there.... That said, I couldn't go all the way to Sydney and not make at least one pilgrimage to a friendly GW, so I stopped at GW Chatswood, staffed by the exceedingly friendly Franz, and picked up one dinky model: A plastic Librarian.

Here's how it's looking now...


Suffice it to say, I had to swap out the head for something a bit more fitting for a Blood Angel, i.e. hairier. I also left out the creepy cherub thing. Yeah, I know his skin tone seems a bit different from his bros in the back. In the past, I used Tallarn Flesh as a base and Elf Flesh to highlight. I'm currently using Vallejo's Dwarf Skin and Basic Skintone now.

Like the plastic commissar, the Librarian is a wonderfully detailed model. There are two things in particular I really like about this model:

  1. The head socket gives you the freedom to pop in a different head, should you so choose. Tight fit, mind you.
  2. The arms and staff are a single piece, allowing you to just paint those bits separately and glue them on later. 
Still lots to do. Right now, I'm trying to decide whether I want to base the gold bits in Iyanden Darksun first. Then comes the fiddly markings on the staff. Force weapons take me ages...

Update:
Later that day...


Yeah, I went with the Iyanden Darksun undercoat. I like. Those who know me may notice this is the first time I've deigned to paint in the eyes. Since he's a psyker, I don't have to dot them, hah!

Wednesday, May 28, 2014

Hungry for 7th...

Man, I am dying for a game of 7th ed... So, to keep myself from going insane, I've been keeping myself busy catching up with some old models and making them presentable. Also, I just whipped these up:


Nothing complicated here. Just a little paint and varnish and putting some old, old decals to good use. For Eternal War missions, I'd just use them like I used to. For Maelstrom of War, the Mysterious Objective dice can just be left beside it, so as not to obscure the number.

Inspired by the performance of the Red Thunder, I decided my Blood Angels needed more boots on the ground, so here are my 3 Tactical Squads to bolster the ranks.


I assembled the heavy bolter dude a long, long time ago, mostly because I thought the gun looked cool. Then, having played around with Razorback Assault Squads for a while, I promptly forgot him. Now, after a few more games of putting mere mortals on the board, a gene-enhanced super-soldier toting a massive, rapid-firing gun is looking more attractive than ever, so I painted this guy up, just in case.


I'm pleased to see that 2 editions since I started my Blood Angels, the meltagun still hasn't gone out of fashion. You gotta love a weapon designed to kill any one thing it's pointed at...


While I can say my technique with decals has improved over the years, the quality of Space Marine decals has not. Seriously, how do you get these things to lie perfectly flat on those pauldrons??

Left: New grunt, right: Very, very old grunt. From my first Tactical Squad, in fact. 
There's still plenty of line highlights that need doing here, but on the whole I'm pretty pleased with my rank and file.  Now let's see how well I keep them alive...


Wednesday, May 7, 2014

Earned their stripes...


... and almost ready for duty. At 3 pts per model, duty mostly consists of stopping bullets. Holy crappe, these little dudes are TEDIOUS...

In other news, it is with great trepidation that I wait for 7th edition, especially with this:


Well, crap. I swear, if they don't have at least a plastic Greater Daemon to go with this daemonology silliness... But you know what? The hell with it. 6th ed has been great fun and I've every intention of getting a couple more games in with my Astra Militarum. And it's worth looking back at the doomsaying over the advent of 6th ed. Can't really say which way the beautiful game is going to swing, but I'll happily wait and see...

Thursday, May 1, 2014

GLORY to the first man to die!


Not quite done, but I couldn't resist snapping a pic and putting him up. I considered painting the sash in a deep red to match the Guardsmen around him, but figured since the Commissariat is a separate body, it would look better to show that the commissar is an outsider in some way. Anyhoo, just a tiny bit more work to do, mainly on the weapons. Then I've got to paint up some Conscripts for him to abuse...

Sunday, March 16, 2014

WIP: Imperial Knight, part 2

So, I devoted all of this weekend's hobby time to the Knight, who is certainly deserving of a name, as soon as I think of one. Here's my progress so far.


Don't let the armour plates fool you; they're held in place with Blu-tack. Only the one covering the top of the head has been deemed sufficiently complete to be glued into place. As for the others, there's a lot more to be done.

Here's a closer look at the carapace. I'm paying extra close attention to this, seeing as it's the most visible part. After I line highlight all the red with some Trollslayer Orange, I can start applying decals.


The little green window was done by painting successively smaller crescents of Dark Angel Green, Warboss Green and Scorpion Green in the lower right corner, followed by a dot of white in the upper right corner. Note that the transition between Dark Angel Green and Warboss Green is quite large, so that took a little blending.

The Cog Mechanicum's white bits were done in Ulthuan Grey, followed by a wash of Nuln Oil, then layering again with Ulthuan Grey. I line highlighted with a little Ceramite White on the edges. The black bits are just black with line highlights of Codex Grey. The brassy bits in between are simply Dwarf Bronze washed with Devlan Mud.

All the rivets were washed with Nuln Oil then highlighted with a dot of Ironbreaker. Tedious, but I kind of like the effect.

Doing the chainsword's stripes as black on yellow was definitely easier, as I didn't have to worry too much when applying the coats of Iyanden Darksun necessary to achieve a solid yellow. After that, it was a simple matter to pick out the stripes, then brighten the yellow with Golden Yellow.

The armour plates are all going to be blacklined with Nuln Oil, then line highlighted. A pretty arduous process, but I think it'll be worth it. Here's a closer look comparing two armour plates, before and after blacklining:


Anyhoo, after the detail work is done, decals! After that, final touch-ups and we're ready for WAR!


Sunday, March 9, 2014

Knight, knight, knight!

Ok, so I couldn't resist getting started on the Imperial Knight, and the Blood Angel Tacticals are gonna be put on hold for a while. Story of their lives, really. Anyway, to business...

The kit is absolutely excellent. The pieces fit together beautifully, and there were barely any mold lines for me to file or scrape off. That said, though, the Knight is a fairly complex model, and to make life easier when the time comes to paint it, a little forward planning is in order.


Painting-wise, the components can be divided into 2 main parts, i.e. Carapace, and everything else. The carapace will form the most visible part of the Knight, bearing its colours and heraldry, so it's best to leave those unglued for the moment and only glue them on after they've been painted. Here's a nekkid Knight.


Here are a couple of pics of the shoulder joint...


It's worth noting that if you glue on the pauldron (big shoulder armour plate-thing), it is actually quite impossible to slot the arm in on those plastic tabs in the previous couple of pictures. Think about the final pose carefully. I recommend gluing the arms in position.


I wanted my Knight to have a reasonably boombastic base. The thing was, the knight's legs only come in one sensible position, with both feet flat on the ground. Usually, if I want a somewhat nicer base, I'd use some corkboard to simulate rock, then pin the model in place after painting the model and base separately. Thing was, with the Knight's feet... well, see for yourself.


Yep, nothing to pin. So I decided to just use my plain old standard technique. First, glue the model on the base...


Then cover it with PVA glue and sand...


And then, I plan to proceed as usual, using the usual colour scheme for the base that I use on my Blood Angels. If figure that, at that size, I'd rather go with a simple base to begin with and embellish it as time goes by. Kind of like how I put trophies on the bases of certain models after particularly notable victories.

So, with the model assembled, next came spraying. My weapons of choice:


And the result so far...


Well, of course it's going to be red; what did you expect? Since I've decided to take this opportunity to do a little freehand work, I'm gonna paint this in the colours of House Raven. Stay tuned, more to come soon...

SOON...

Tuesday, March 4, 2014

Quick update

Been a while since I posted anything, so I'm just gonna leave an update on what's been going on.

First off, I've been involved in a big game of Apocalypse. 10,000 pts and 3 players a side, with an Armageddon theme, i.e. Orks vs the Imperium. As elected Warmaster for the Imperials I spent a hell of a lot of time planning and plotting how to annihilate my Orky foes, and to fit the event, I had kitbashed Tycho here.


Ooh, what's that, Tycho? Got a new trophy for yourself, I see! That pretty much says everything about how that Apocalypse game went... :-)

For the game I had also assembled a couple of gunslinger sergeants. Those of you who have looked at the Blood Angel codex a little more closely will note that Blood Angel Assault sergeants can wield 2 pistol weapons at once. So, for 240 pts, I can deep strike 4 melta weapons with the Blood Angels' signature accuracy. Sounded good to me, and especially lethal in games of Apocalypse, where the Precision Coordinates Strategic Asset pretty much guarantees these guys will be a position to seriously hurt something. Honestly, though, paired pistols are just too cool not to take. I just wish models were allowed to use them in close combat in the same way as Cypher.


While scouring my collection for stuff to field in the big Apoc game, I noticed poor old Sgt Gideon from Space Hulk. Dug him out and am currently working on finishing him off.


I've been a bit naughty with Gideon. He really hasn't seen all that much combat, let alone against Tyranids, to warrant the placing of that lovely trophy at his feet. Still, at some point he'll make a lovely Terminator Captain. Just a couple of final little touches to go. And when he's done, I've lots of Tactical Marines that still need my attention. And when *they're* done...


In case there's any doubt at all on what's in the box...


Oh, yes... It'll be quite some time before I get this guy operational, though. That's what I've been working on, and now I've gotta get back to work, so, I'm-a sign off here.

Tuesday, February 4, 2014

What's on the table: TACTICALS!

In a couple of previous posts, you might have glimpsed, them, well, here they are now, dominating my table:


As part of a Grande Planne to get some use out of Tacticals again, I've started work on 2 squads of Tactical Marines. All these models are a few years old and have been gathering dust on my shelves since I discovered the joys of Blood Angel Assault Marines in Razorbacks, which is to say, a hell of a long time. The marines with heavy weapons on the right have been waiting to be fielded in some way since I constructed them. I think of it as one of the perks of having an old collection, really. When I want to assemble a new unit, sometimes, just sometimes, I can reach into my reservoir of neglected plastic and pull out goodies. Like E K Tycho.

Anyway, here's a stage by stage breakdown of what I'm doing with them.

How to do simple basing, Part 2 of 2

So, last post, I explained how to base with sand. This post, I show you how to paint it. So, continuing from before...

Step 5: Spray! Well, that's how I get my painting done. Fortunately, I'm in the middle of a big project for my Blood Angels, so I've lotsa models to choose from...


This here is how a Tactical Marine looks after spraying with Mephiston Red. Then I gave him a quick coat of Blood Red on the armour plates.

Step 6: Coat the base in Mournfang Brown. Don't forget to thin your paints!


Step 7: Drybrush with Screaming Skull. I recommend using a nice, cheap flatheaded brush, like the ones you can still find at Daiso. Don't forget to clean up the edges after you're done.


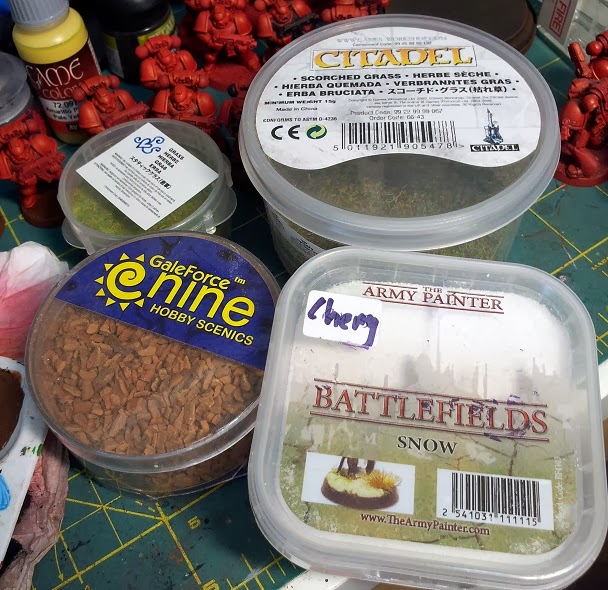
Step 8: Static grass! Dab a little PVA glue where necessary, then apply static grass or flock with a pair of tweezers. As with the sand, tilt the model and tap away the excess and your base is more or less done!


Suffice it to say, there's no shortage of stuff out there for you to glue onto bases to give them a little more character. I for one like to paint up and glue the severed heads of vanquished armies on the bases of Warlords and MVPs.