Showing posts with label modeling. Show all posts

Saturday, September 20, 2014

A 40k gamer in Gunpla-land...

So, it's been a little over 1 month since I started constructing and painting Gunpla in the style of my 40k minis.

On the whole, it's been heaps of fun. The poseability of the models has made for more interesting challenges in constructing and painting the models, i.e. rather than the single static pose I'm used to, I had to account for the fact that these models are meant to be movable. As such, I had to be a bit more thorough in reaching every nook and cranny of the model, which meant painting components separately, something quite alien to me.

Also, bringing my experience as a GW hobbyist into Gunpla, there were some things in Gunpla-land that struck me as odd, notably:

  • Gunpla markers - This just seemed like nonsense to me. Painting is meant to be done with a brush!
  • Coloured plastic sprues - I'm going to paint the model anyway; what use have I for coloured plastic? I'd rather they make everything in grey plastic, if that would keep costs (and hence prices) down...
  • Stickers - Not water-slide decals, mind you. These supposed High Grade kits come with stickers! Again, utterly useless to me, but I suppose this is to cater to the needs of small children, like the markers.  

Here's a summary of what kits I've tried thus far, in order of construction:

Gouf Custom

 This one holds a special place in my heart as the first I'd constructed, and it shows in the little errors I'd made in painting it, notably in the elbow joints (not visible in this pic). A nice, straightforward kit, with pretty much no superfluous bling. The gatling shield was a bit fiddly, though. As I had to strike a balance between what I could paint and what could be moved, I chose to glue the weapons permanently into the hands. Citadel colours weren't made for the wear and tear of constant friction like that, so I opted to glue weapons into the hands whenever possible.

Buster Gundam

I had good memories of watching Gundam SEED while in uni, and Buster's got a satisfyingly large gun, so I went for it. This kit annoyed me somewhat with how skinny it was - so scrawny that there's no space for an action base peg in its crotch. Also, on further consideration, I didn't like the cream colour on the original Buster, so sod that, Caliban Green all round!


Sengoku Astray

This is the first Gundam Build Fighters kit I did. I watched the series first, and long before that, I had been in kendo, hoping to one day win the right to bear 2 blades. I stopped kendo before that could happen (long story) but since then I'd always had a soft spot for minis carrying paired swords.

This one's stickers drew particular scorn from me. What use had I, a long time Necron player, for shiny green stickers? Anyway, on constructing the kit, I was drawn to how simple, versatile and flexible the Red Frame was, and became increasingly disenchanted with the over-the-top aesthetic of gunpla from Gundam Build Fighters.

As for the paint job, I tried staying faithful to the colours as seen in the anime, adding my own touch for the glowy green bits, of course. All in all, an ok kit.


Kampfer Amazing

Due to a mistake in spraying, my original plan to keep the colours close to the anime version went to pot, and thus I found myself painting my first miniature in Ultramarine colours. A nice model, but the legs are a little harder to pose, bulky as they are. Also, the weapon binders/thrusters were just too ludicrously big for me to take seriously, and so I left those out.


Genoace Custom

I am led to understand that suits from the Gundam AGE anime series are viewed as childishly simple and hence unsatisfying to build and paint. This one caught my eye for being completely white and so I thought I'd try my hand at doing a nice white model. On top of that, the pilot of this suit in the anime carries the monicker "White Wolf", so I figured it would be a good place to dump some Space Wolf transfers.

It was, as they say, absurdly easy to build and a very simplistic model. I think there's a kind of subdued beauty to it, but yeah, it was easily the quickest to construct, matched only by another AGE suit, Shaldoll Rogue.

I went with a simple white scheme, mostly spraying white, using Nuln Oil to blackline and then go over any mistakes with Ceramite White. As I've mentioned before, a ridiculously easy build.


Shaldoll Rogue


Another ludicrously simple kit from Gundam AGE. By this point, I'd gotten so little satisfaction out of building it, that I just couldn't be arsed to paint it, and so it sits, unpainted, waiting for some day when I've nothing else better to paint...

Jesta Cannon

My current WIP. A nice chunky kit with lotsa guns. By the time I was halfway through with this one, I came to realise that the Universal Century kits were more to my liking, with plenty of simple, practical-ish suits that look like they were designed by engineers rather than over-enthusiastic artists with a tenuous grasp of of real-world physics.


Exia Dark Matter

I was suckered into getting this kit by the fact that it bore two blades. I will say this for the model: It SUCKS. The joints are mostly bereft of the polycaps that give most gunpla their poseability, instead using the same hard plastic as the rest of the model, resulting in joints that become way too loose too quickly. For another, the colour of the supposed red bits is in fact this vile shade of carmine; that is to say, it's pinkish. For someone who's been playing Blood Angels as long as I have, this colour is an abomination.

But, far be it from me to let good plastic go to waste. This one, I will paint. BUT it will never see tabletop action, and will have its joints glued permanently into position and spend the rest of it's days perched atop a GP Base.

So... what next? 
On to MG, I suppose! Well, I gotta have something to keep me busy while I wait for the new BA codex...


Sunday, March 9, 2014

Knight, knight, knight!

Ok, so I couldn't resist getting started on the Imperial Knight, and the Blood Angel Tacticals are gonna be put on hold for a while. Story of their lives, really. Anyway, to business...

The kit is absolutely excellent. The pieces fit together beautifully, and there were barely any mold lines for me to file or scrape off. That said, though, the Knight is a fairly complex model, and to make life easier when the time comes to paint it, a little forward planning is in order.


Painting-wise, the components can be divided into 2 main parts, i.e. Carapace, and everything else. The carapace will form the most visible part of the Knight, bearing its colours and heraldry, so it's best to leave those unglued for the moment and only glue them on after they've been painted. Here's a nekkid Knight.


Here are a couple of pics of the shoulder joint...


It's worth noting that if you glue on the pauldron (big shoulder armour plate-thing), it is actually quite impossible to slot the arm in on those plastic tabs in the previous couple of pictures. Think about the final pose carefully. I recommend gluing the arms in position.


I wanted my Knight to have a reasonably boombastic base. The thing was, the knight's legs only come in one sensible position, with both feet flat on the ground. Usually, if I want a somewhat nicer base, I'd use some corkboard to simulate rock, then pin the model in place after painting the model and base separately. Thing was, with the Knight's feet... well, see for yourself.


Yep, nothing to pin. So I decided to just use my plain old standard technique. First, glue the model on the base...


Then cover it with PVA glue and sand...


And then, I plan to proceed as usual, using the usual colour scheme for the base that I use on my Blood Angels. If figure that, at that size, I'd rather go with a simple base to begin with and embellish it as time goes by. Kind of like how I put trophies on the bases of certain models after particularly notable victories.

So, with the model assembled, next came spraying. My weapons of choice:


And the result so far...


Well, of course it's going to be red; what did you expect? Since I've decided to take this opportunity to do a little freehand work, I'm gonna paint this in the colours of House Raven. Stay tuned, more to come soon...

SOON...

Tuesday, February 4, 2014

How to do simple basing, Part 2 of 2

So, last post, I explained how to base with sand. This post, I show you how to paint it. So, continuing from before...

Step 5: Spray! Well, that's how I get my painting done. Fortunately, I'm in the middle of a big project for my Blood Angels, so I've lotsa models to choose from...


This here is how a Tactical Marine looks after spraying with Mephiston Red. Then I gave him a quick coat of Blood Red on the armour plates.

Step 6: Coat the base in Mournfang Brown. Don't forget to thin your paints!


Step 7: Drybrush with Screaming Skull. I recommend using a nice, cheap flatheaded brush, like the ones you can still find at Daiso. Don't forget to clean up the edges after you're done.


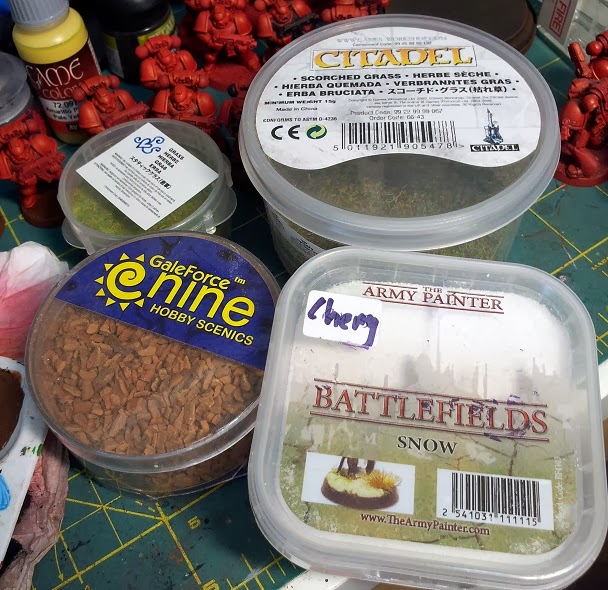
Step 8: Static grass! Dab a little PVA glue where necessary, then apply static grass or flock with a pair of tweezers. As with the sand, tilt the model and tap away the excess and your base is more or less done!


Suffice it to say, there's no shortage of stuff out there for you to glue onto bases to give them a little more character. I for one like to paint up and glue the severed heads of vanquished armies on the bases of Warlords and MVPs.


Monday, February 3, 2014

How to do simple basing, Part 1 of 2

I've been asked this a couple of times before, so here's the way I do it. Do bear in mind, every model I assemble and paint is for the purpose of gaming. I'll never put in the effort to paint a model unless I'm going to put it on a gaming table and pop a can of whupass with it. As such, I will probably never reach the lofty standards of those magnificent pro painters at Cool Mini Or Not. Anyway, enough talk. Here's how I base my minis.

Step 1: Minis on their bases. Here we have plug n' play marines sat in their bases. I suppose if they weren't rank and file, I'd give them a little more love and file down the tab until it's level with the base, but naaaah...


Step 2: Glue! I use this stuff.


Yeah, as you can see I've been using this bottle a LONG time. 3 years, I think.  Use an old brush and apply a layer of the stuff, like so:


If, like me, you live with pets, you might want to keep an eye out for unwanted fur. Make sure the whole base is covered. Work quickly with larger bases.

Step 3: Drown the bugger in sand. Your favoured texture may vary, but just make sure you have a nice big tray to completely submerge the model in.


Don't be shy with the sand...


Step 4: Turn the model on its side in the tray and tap away the excess, rotating as you go. Unfortunately, I needed both hands for that so no picture. Here's the end result:


At this point, feel free to use your fingers to wipe away any sand hanging over the edge.


And that's how I sand my bases. It's worth pointing out that it helps to plan ahead and think about where you can reach with your brush before gluing the mini on its base, especially with more complex minis like the IG Heavy Weapon Teams.

Thus concludes part one. Stay tuned, in the next part, I cover how to paint these bases.

Tuesday, January 21, 2014

Kitbashed Tycho!

I mentioned previously that I was in the mood to paint something nice.Well, since then a whole bunch of other stuff came up and after painting a fortification or two for the FLGS, I decided to throw together some bits to make a Captain Erasmus Tycho for an Armageddon-themed Apocalypse event that's kinda slowly taking off.

Frankly, I just knew I had to kitbash my own Tycho. It's pretty easy for any Blood Angel player to scrounge up the right bits. And I think the original model looks meh. Not nearly dynamic enough. That is not the wrathful angel that is Erasmus Tycho. That's just some grizzled, wounded pretty marine posing for a photo. And I definitely don't approve of that absurd breastplate... Or that absurdly bulky and unwieldly combi-melta... Or even his trademark mask, which is way too bulky to even look like a mask...


So, sod original Tycho; here's my version in grey plastic:


Combi-melta and legs from the lovely new Sternguard Veterans kit.
Arms from the Command Squad.
Backpack and wing-thingy on the left pauldron from the Death Company.
Front torso, head and right pauldron from the Sanguinary Guard.

Note that at this point the head is not glued on yet. If you're gonna follow how I did this, do bear in mind I'm using a lot of Citadel's older colours, so do bear with me...

Sunday, January 12, 2014

Getting Fortified!

Been busy helping the FLGS paint up some fortifications to bolster its scenery pool and, of course, let the place have some nice fortifications to experiment with, the better to showcase the joys of Stronghold Assault. That said, no-one's really dived into Stronghold Assault yet, but I've been poring over its pages quite a bit and I like it. I've always fancied the idea of having an attacker and a heavily fortified defender and Stronghold Assault does exactly that, with some consistent rules and a range of pretty nice fortification models to go with it.

One fun idea that I think would be cool to try is to field an Imperial Guard army and replace ALL the vehicles with an epic fortification network. It probably won't be all that effective, but man, it'll look awesome...

Here's a quick pic of stuff I did last week:


The Aegis Defense Line is also done and tabletop ready. Right now, I'm working on the next fortification that will give us the minimum required to field a proper Fortification Network - a Bastion. It's a BIG model, constructed with big slabs of plastic, so it'll need a bit of extra effort to make sure everything fits nicely. Here we see my method of choice - rubber bands!


Being an older model, the Bastion is also pretty flimsy. Big sections of pretty thin plastic, held together by rather weak joints. So, during the course of its construction, I reinforced it where I could by snipping up bits of the plastic sprue to use as supporting struts and gluing them in place: 


A quick spray and lotsa drybrushing later and here's where we are now:


Let's see if I can get this ready for the weekend...

In other news, the new Tyranid codex has just been released. My heart goes out to all the Nid players out there. I myself started dabbling in 40k with Nids back in 3rd edition. I've no idea where that army is right now. Anyway, if Frontline Gaming's batrep is anything to go by, the Nids got their narrative forged pretty hard...

Tuesday, January 7, 2014

Guard needs moar gun...


Adding a little more to the Red Thunder - I've more or less expanded as far as I'm willing in terms of vehicles, so the only thing left is to fill in the infantry element. Those of you who know me will know I'm fairly cautious in collecting. When I choose a model, I generally go for things that:
  1. Look good on the tabletop; (I will never field Centurions, Dark Talons, Land Speeder Vengeance, Nemesis Dreadknights...)
  2. Pop a can of whupass on said tabletop (admittedly, some units may need a little coordination to achieve said whupass, e.g. the Catachan Devils)
  3. Have cool fluff; 
  4. Probably won't get nerfed into total uselessness. (Alas, poor Sanguinary Guard...) 
  5. Are PLASTIC. Coz I hate how paint chips off metal so easily and Failcast is full of fail. 
So, with that in mind, here's more crew-served dakka for the Red Thunder!


Saturday, January 4, 2014

1st weekend of hobbying for 2014!

Got in a game with the Necrons:


1,750 pts vs Chaos. I've never been so badly betrayed by my dice. Ever. Soddit, the less said the better. On to more cheerful things...

The Boss of my lovely FLGS has entrusted me with the construction of an Imperial Bunker for public use at said FLGS. I figured that a lot of people are a bit iffy about Stronghold Assault, so having a couple of readily available fortifications to experiment with would persuade more gamers to give them a try and maybe start building fortification networks of their own.


The bunker is really easy to construct. For those of you who are looking to station your heavy weapon teams on the battlements, note that only one side can comfortably fit one. Try to place a heavy weapons team on the other and it won't quite fit, as seen below...


That big fire port on the skull side, however is a nice place to put an autocannon...


And that's it for now. Stay tuned, will post pics when I finish painting it...

Sunday, December 8, 2013

Hobby: Cheapass forests Mk II

I did a post a while back detailing how I made some quick, easy and, most importantly, functional forest terrain for 40k and/or Warmachine. I have since acquired more useful mats and refined the technique somewhat. Instructions follow...

First, get your cheapass rubber mats. This time I've opted for something brown. Also, get some cheap plastic foliage. We're gonna snip that up later.

Brown mats MYR 17.80, fake grass MYR 4.90. Bought from Kaison in Paradigm Mall. Cat is free, picked up off some grubby street somewhere. 

Second, as before, outline the shapes of the desired forests...


Snip, snip, snip...

Don't mind the missus. She's just passing through. 

Next, pull out some suitable forest-y spray paints and cut up the foliage into small patches...

Souseki prefers a colour that goes with his eyes. 

Ta-dah!


And with some models to show how it'll look...

Sarge is dead. Captain's dead. Over half the squad's dead. Forest wants to eat us. Just another sunny day in the Imperial Guard... 
Of course, one can always find or make some other model trees to get a more convincingly tall forest. So, that's it from me for now. Stay tuned, more projects await...